Introduction
If you have read the introduction to Fashione, it briefly mentioned about the best way to create products and add stock based on what type of retailer you are.
If you are a seasonal retailer, we would recommend that you look at the order creation section to create your products and load your order quantities.
Using purchase orders, allows you to create products and load your order quantities in advance. Then when they are delivered, you can book the order in. This will then create the stock levels.
Creating orders and booking in deliveries will create useful information such as sell through and supplier performance.
If you’re not a seasonal retailer, we would suggest that you can add the stock directly when creating the products. Sell through and supplier performance will not be available, but you can still use the sales data in our sales reports to review sales performance by brand, category, department ECT.
Product Creation and management is in Style File. This is found under Products.
Styles File
Styles file is where you can create your products and search existing products and edit products.
Here is a video on a quick run through styles file:
Creating a product
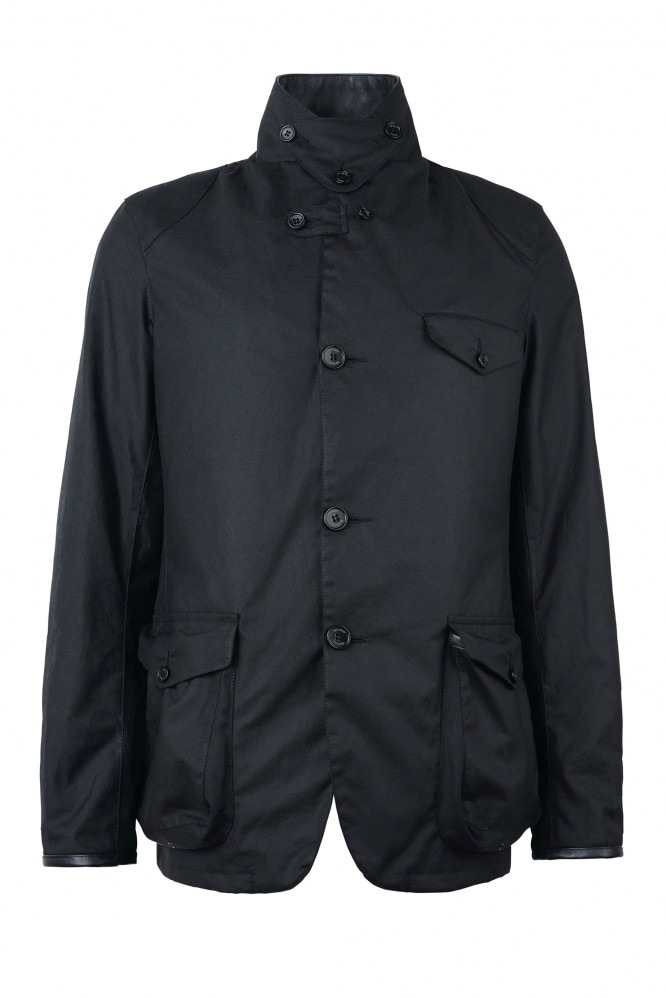
For our example item, we are going to be adding this Barbour Jacket. The Beacon Sports Jacket is available in Olive and Black.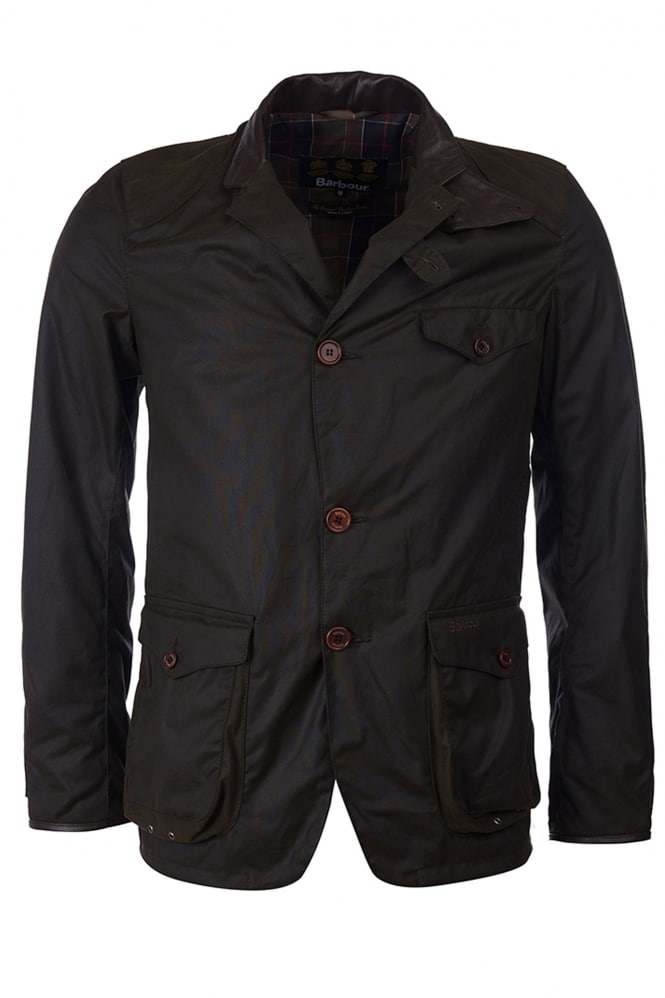
To add a product, press add  .
.
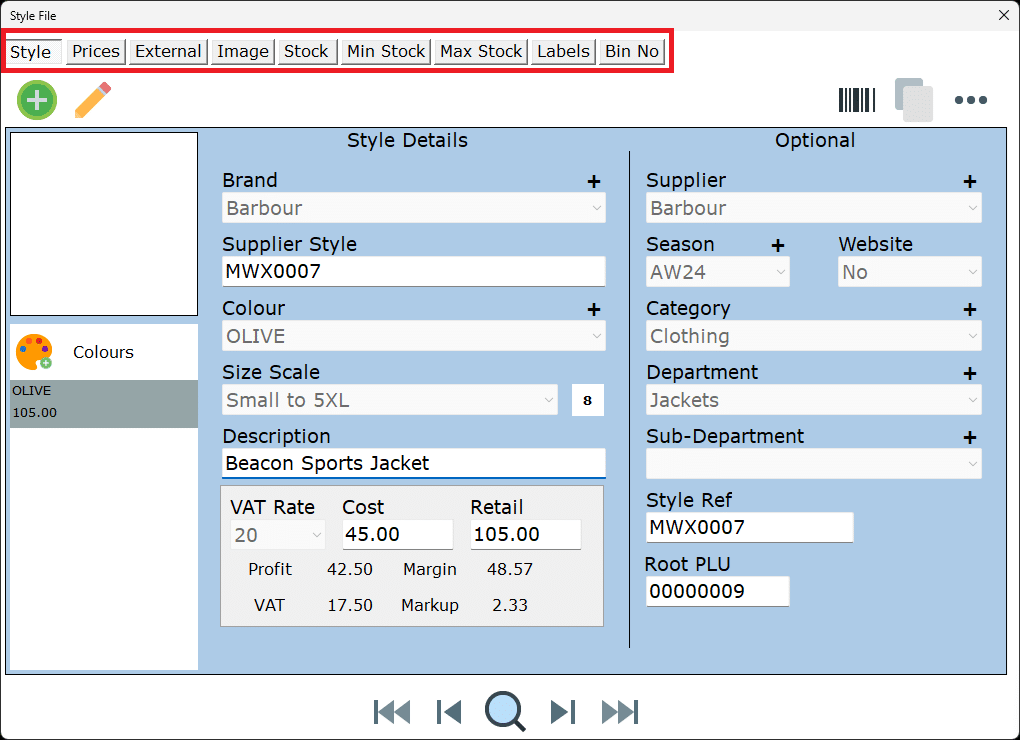
Brand for example, uses the brands you added in your initial set up. However, if you need to create a new brand you can use the quick add button +.
Supplier Style is the styles unique item code.
This Jackets unique style number is MWX0007.
Colour is Olive, we will add the black on later.
Size Scales need to exist before you can create the product, if your size scale doesn’t exist you will need to go back into settings.
This jacket comes in Small to 5XL, select the size scale for this size range.
Description is a short description of the item.
This Jackets description is Beacon Sports Jacket
Set the items VAT rate, Cost prices, and Retail Price.
In Fashione, cost prices are excluding VAT and retail prices are including VAT.
There is a price calculator button  , this allows you to work out your retail prices by mark up, margin or profit.
You can continue to set the optional style details.
Supplier: Barbour
Season: AW24
Category: Clothing
Department: Jackets
Sub- Department: Left Blank
Once finished, you just press save, to create the item.
Now the item has been saved, multiple tab options will appeared.
Adding another colour
We have just created the Beacon Sports Jacket in Olive. To add another colour option, press the colour pallet  . Tick the colour the product is also available in, and press ok. This will now display the item with its available colours.
Adding Stock
You can add stock by going to the stock tab.
As mentioned not using orders or deliveries will make sell through and supplier performance unavailable.
Select the branch you want to add stock to, and then press the edit pencil  .
.
The top grid is showing you what the stock is now, and the bottom grid is where you can add or adjust the stock levels.
When you have added stock, labels will automatically generate in the label printer.
Copying a product
You can copy a product by pressing copy  .
.
Copying a product speeds up product creation, say if you are adding on a few jackets from the same brand.
It copies over Brand, Sizescale, VAT Rate, Cost, Retail Price, Supplier, Season, Category, and Department.
Meaning you only need to fill in Supplier Style, Colour and Description.
Any product settings copied over can be changed.
Searching Products
You can search products by using the magnify glass  .
.
When you press search again your last search results will load, press clear to start a new search.
You can also search by scanning the barcode  .
.
Product Information
Product information is available to view on the product information tabs that are located at the top of styles file.
Prices
Prices allows you to change the prices and VAT Rate per size.
External – EAN/SKU Barcodes
This is where you can tag EAN Barcodes. EAN Barcodes are usually the barcodes that come on the products from the supplier.
Not all suppliers or brands provide barcodes on their items, but if a brand comes already priced and has a barcode, you can tag the barcode in Fashione and this will then scan at the till.
EAN barcodes are unique to that brand, so if you do sell online, it is also worth adding this information so it can pass over to your website for google shopping (if integrated).
Simply add the barcodes and press save  .
.
Images
Image is where you can add one image per style.
Using images in Fashione does require a third-party sync service as your images will be stored locally and not in the Fashione Cloud.
This image will appear on any Fashione Office or POS that has access to the sync.
Images on Fashione, do not transfer to an integrated website. This is because on your website you need multiple high-resolution photos for one garment. Storing such high number of images in Fashione is unnecessary.
Min Stock /Max Stock
Allows you to add minimum and maximum stock levels by branch, for if the product is a continuous stock item.
This feature is switched off by default, and can be switched on in security.
Min/Max Stock can be used in Purchase Orders & Replenishment.
Labels
Shows you the number of labels in the label printer. You can use this to add more labels into the label printer.
Add the label quantities and press save .
Adding barcodes is NOT adding stock. To print your labels, you will need to close style file and navigate to label printer.
Bin No
Allows you to set bin locations by branch, against the style selected.
Add bin number. Press save .
You can right click for more copy features. Bin Numbers are used in transfers and some website integrations.
Website
The website tab will only be visible if you have multiple, integrated websites. This is where you can control the products website flags.
More Options Menu
The meatball menu  also known as the three-dot menu, expands on more options available for the product displayed.
Delete
Using delete will delete the current selected colour of the product on screen. If there is only one colour the full style will be deleted. If there is more than one colour, you will be left with the remaining colours.
More Information
This is a screen that gives you access to less required information such as date created, last updated, POS Notes and Commodity Codes.
View History
Takes you to the product history.
Other
Takes you to charges, which is only used by Alterations.
Advanced Searching
There are two advance search options.
Cost Price Search: search for items with a specific cost price.
Cost >= Retail: Search for items where cost price is equal to, or greater than the retail price.